
|
原文網址如下
http://cgi.tutsplus.com/tutorials/creating-depth-of-field-using-maya-z-depth-passes-and-photoshop--cg-12050 http://emdiv.com.br/mundo/tecnologia/60204-creating-depth-of-field-using-maya-z-depth-passes-and-photoshop.html Depth of field can prove to be a very effective way to add an overall sense of depth to your final renders, and also helps to draw the viewers focus to a specific area of the image (similar to a real world camera.) In this short tutorial Pratik Gulati, will cover the process of setting up and rendering out Z-Depth passes from Maya, which can later be combined with the beauty pass in Photoshop, to achieve a realistic DOF effect. The gray values within a depth pass represent the distance from the camera, where white is near and black is far. The range in Maya units that this represents is based on the rendered camera’s clipping planes. For this tutorial, I’ll be using Maya 2011 but the steps can be easily followed in both older and newer versions of Maya too. Step 1 So the first thing to do is open your program. 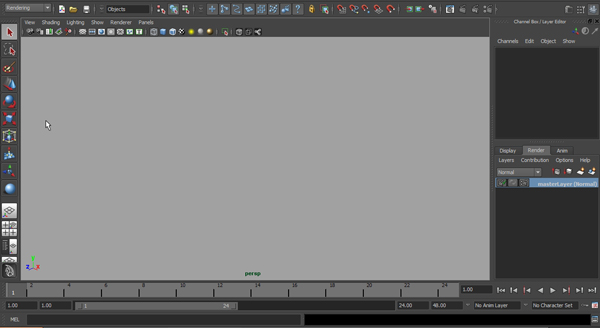 Step 2 First create a simple scene using basic primitives, to test and render out our Z-depth pass (I’ve created a Plane and some Spheres.) 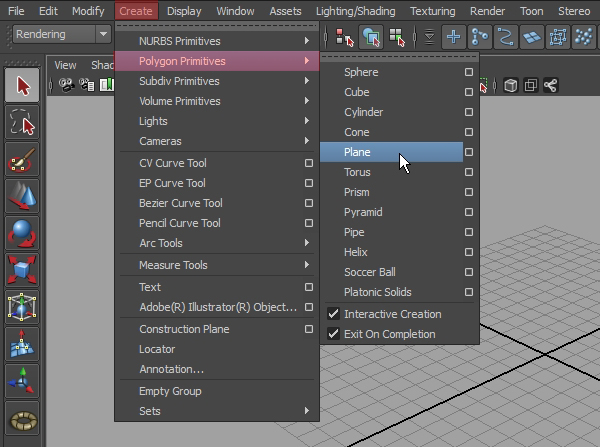 Step 3 Next, select all the objects in the scene and create a new render layer with the selected objects. 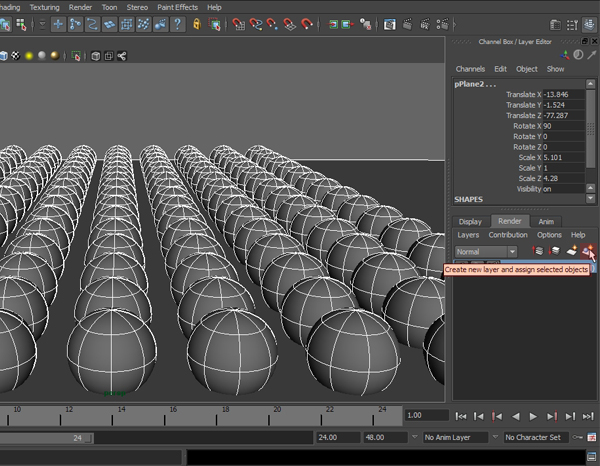 Step 4 Maya method: Right click (on the render layer) to open the "Attributes". This will open up a new window in the layer presets, select "Luminance Depth" from the menu. 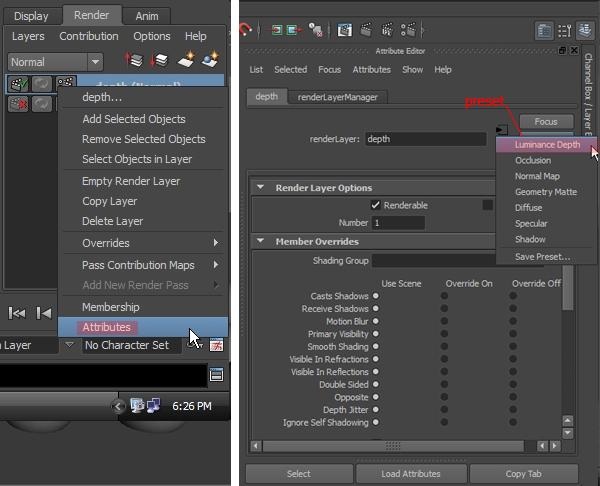 Step 5 Select the camera (View>Select Camera) and open it’s Attributes, make sure "Depth" is checked under the "Output Settings". 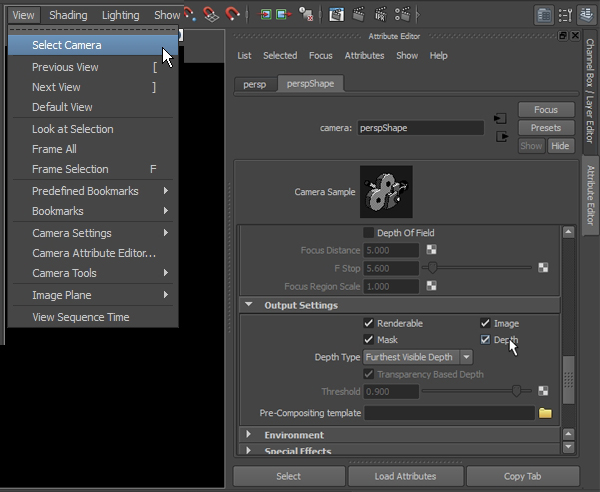 Step 6 In the Edit Render Settings, we change the "Image" Path to our desired location so that we can save out the rendered images. 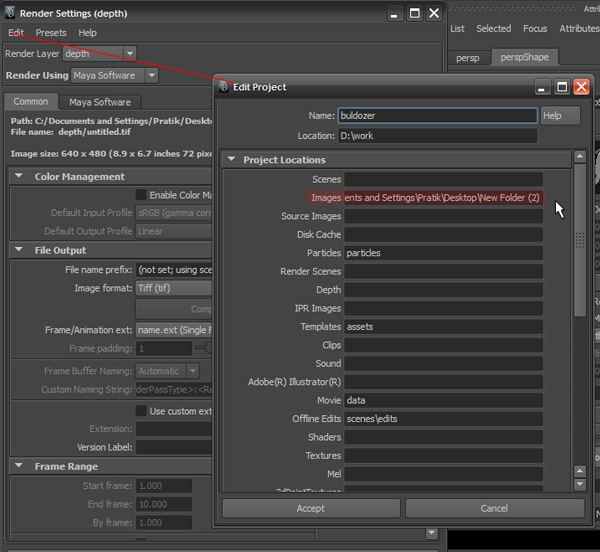 Step 7 Now we can do a "Batch Render" (Render>Batch Render) of our render layers and we will get the following output. 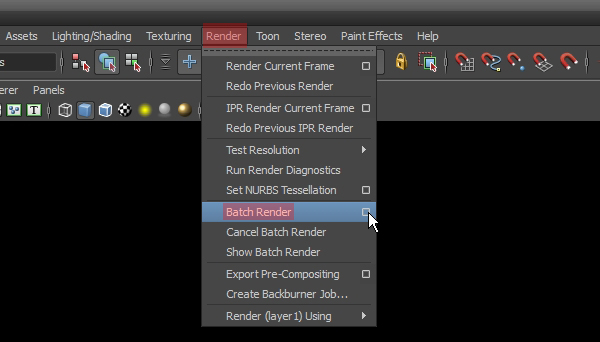 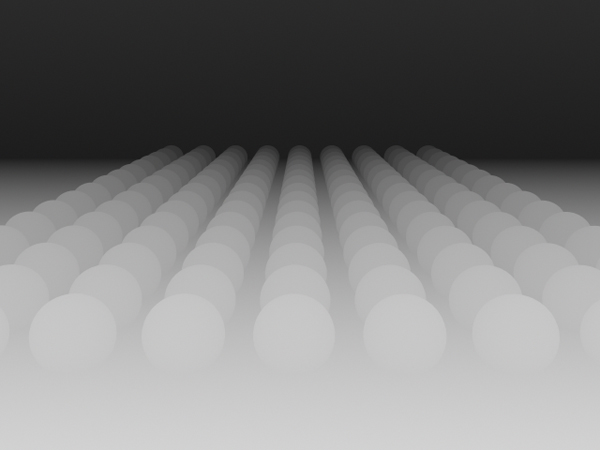 Step 8 Now for the MentalRay method: First, we need to assign "Mental Ray" as our renderer by changing "Render Using" to "Mental Ray". 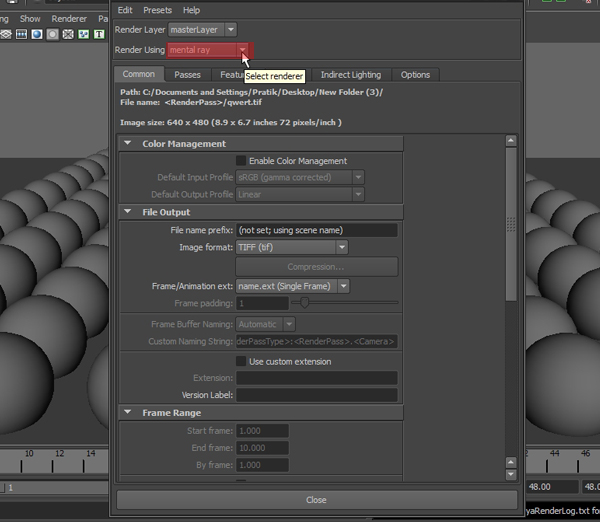 Step 9 In the Render Passes options, I create a new "Camera Depth" pass. Then click on the Green Tick Icon, which will associate the selected pass with the current render layer.  Step 10 In the "Quality" tab, I increase the Sampling Quality as shown below, to get more refined and crisp edges in the render. 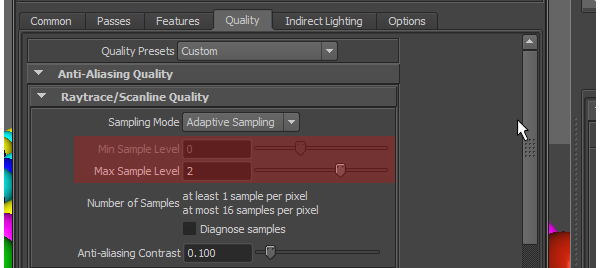 Step 11 We now render out the images using the "Batch Render" (Render>Batch Render) option. Step 12 We now bring both our Z-depth render and Normal render into Photoshop. 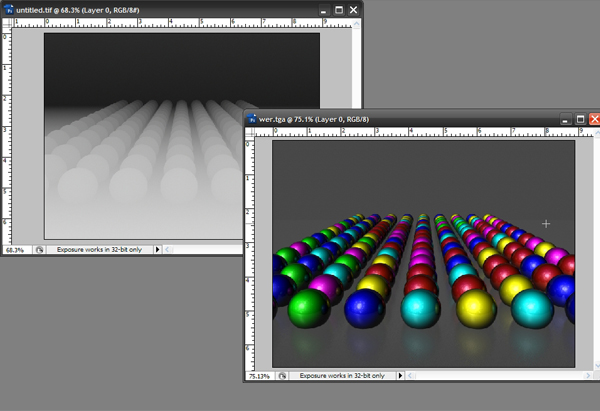 Step 13 Now we copy the Z-depth image (Ctrl+A + Ctrl+C) and paste (Ctrl+V) it into the "Alpha" channel of our normal render. 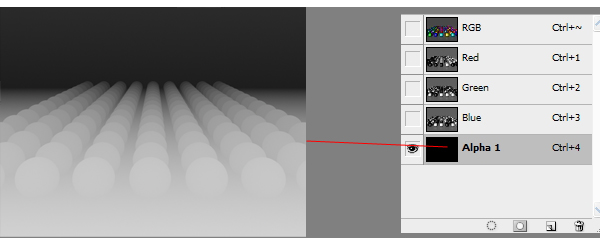 Step 14 We now have the Z-depth render in the alpha channel. We next apply a "Lens Blur" filter by going to Filter>Blur>Lens Blur.  Step 15 This opens a new console. We first turn on the "Preview" option (by checking the box), so we can see the effect in real-time, we also need to choose "Alpha" as our source. 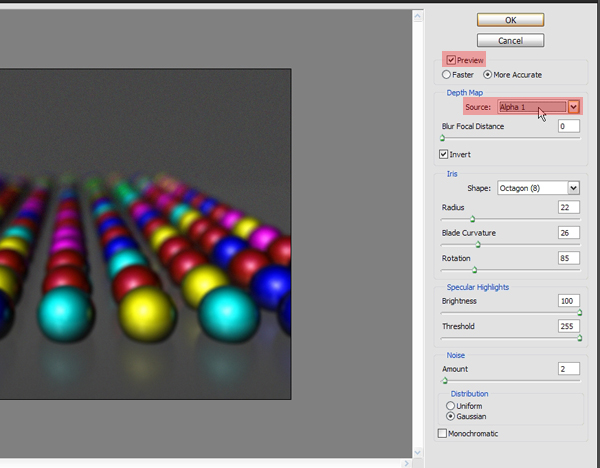 Step 16 The "Blur Focus Distance" and the "Radius" settings are the most important parameters and will define the type of blur. If we decrease the distance setting, the blur will happen from the back to front. And if we increase it, it’s the opposite. 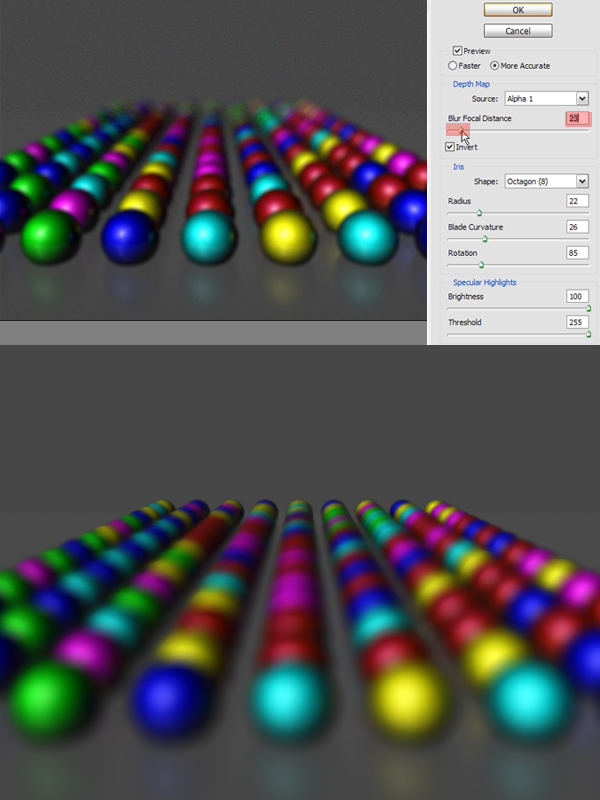 You can experiment with these settings to achieve an overall Depth Of Field you’re happy with for your renders. |
Labels: CG Tutorials, maya, maya tutorials


